🧩 Match 3
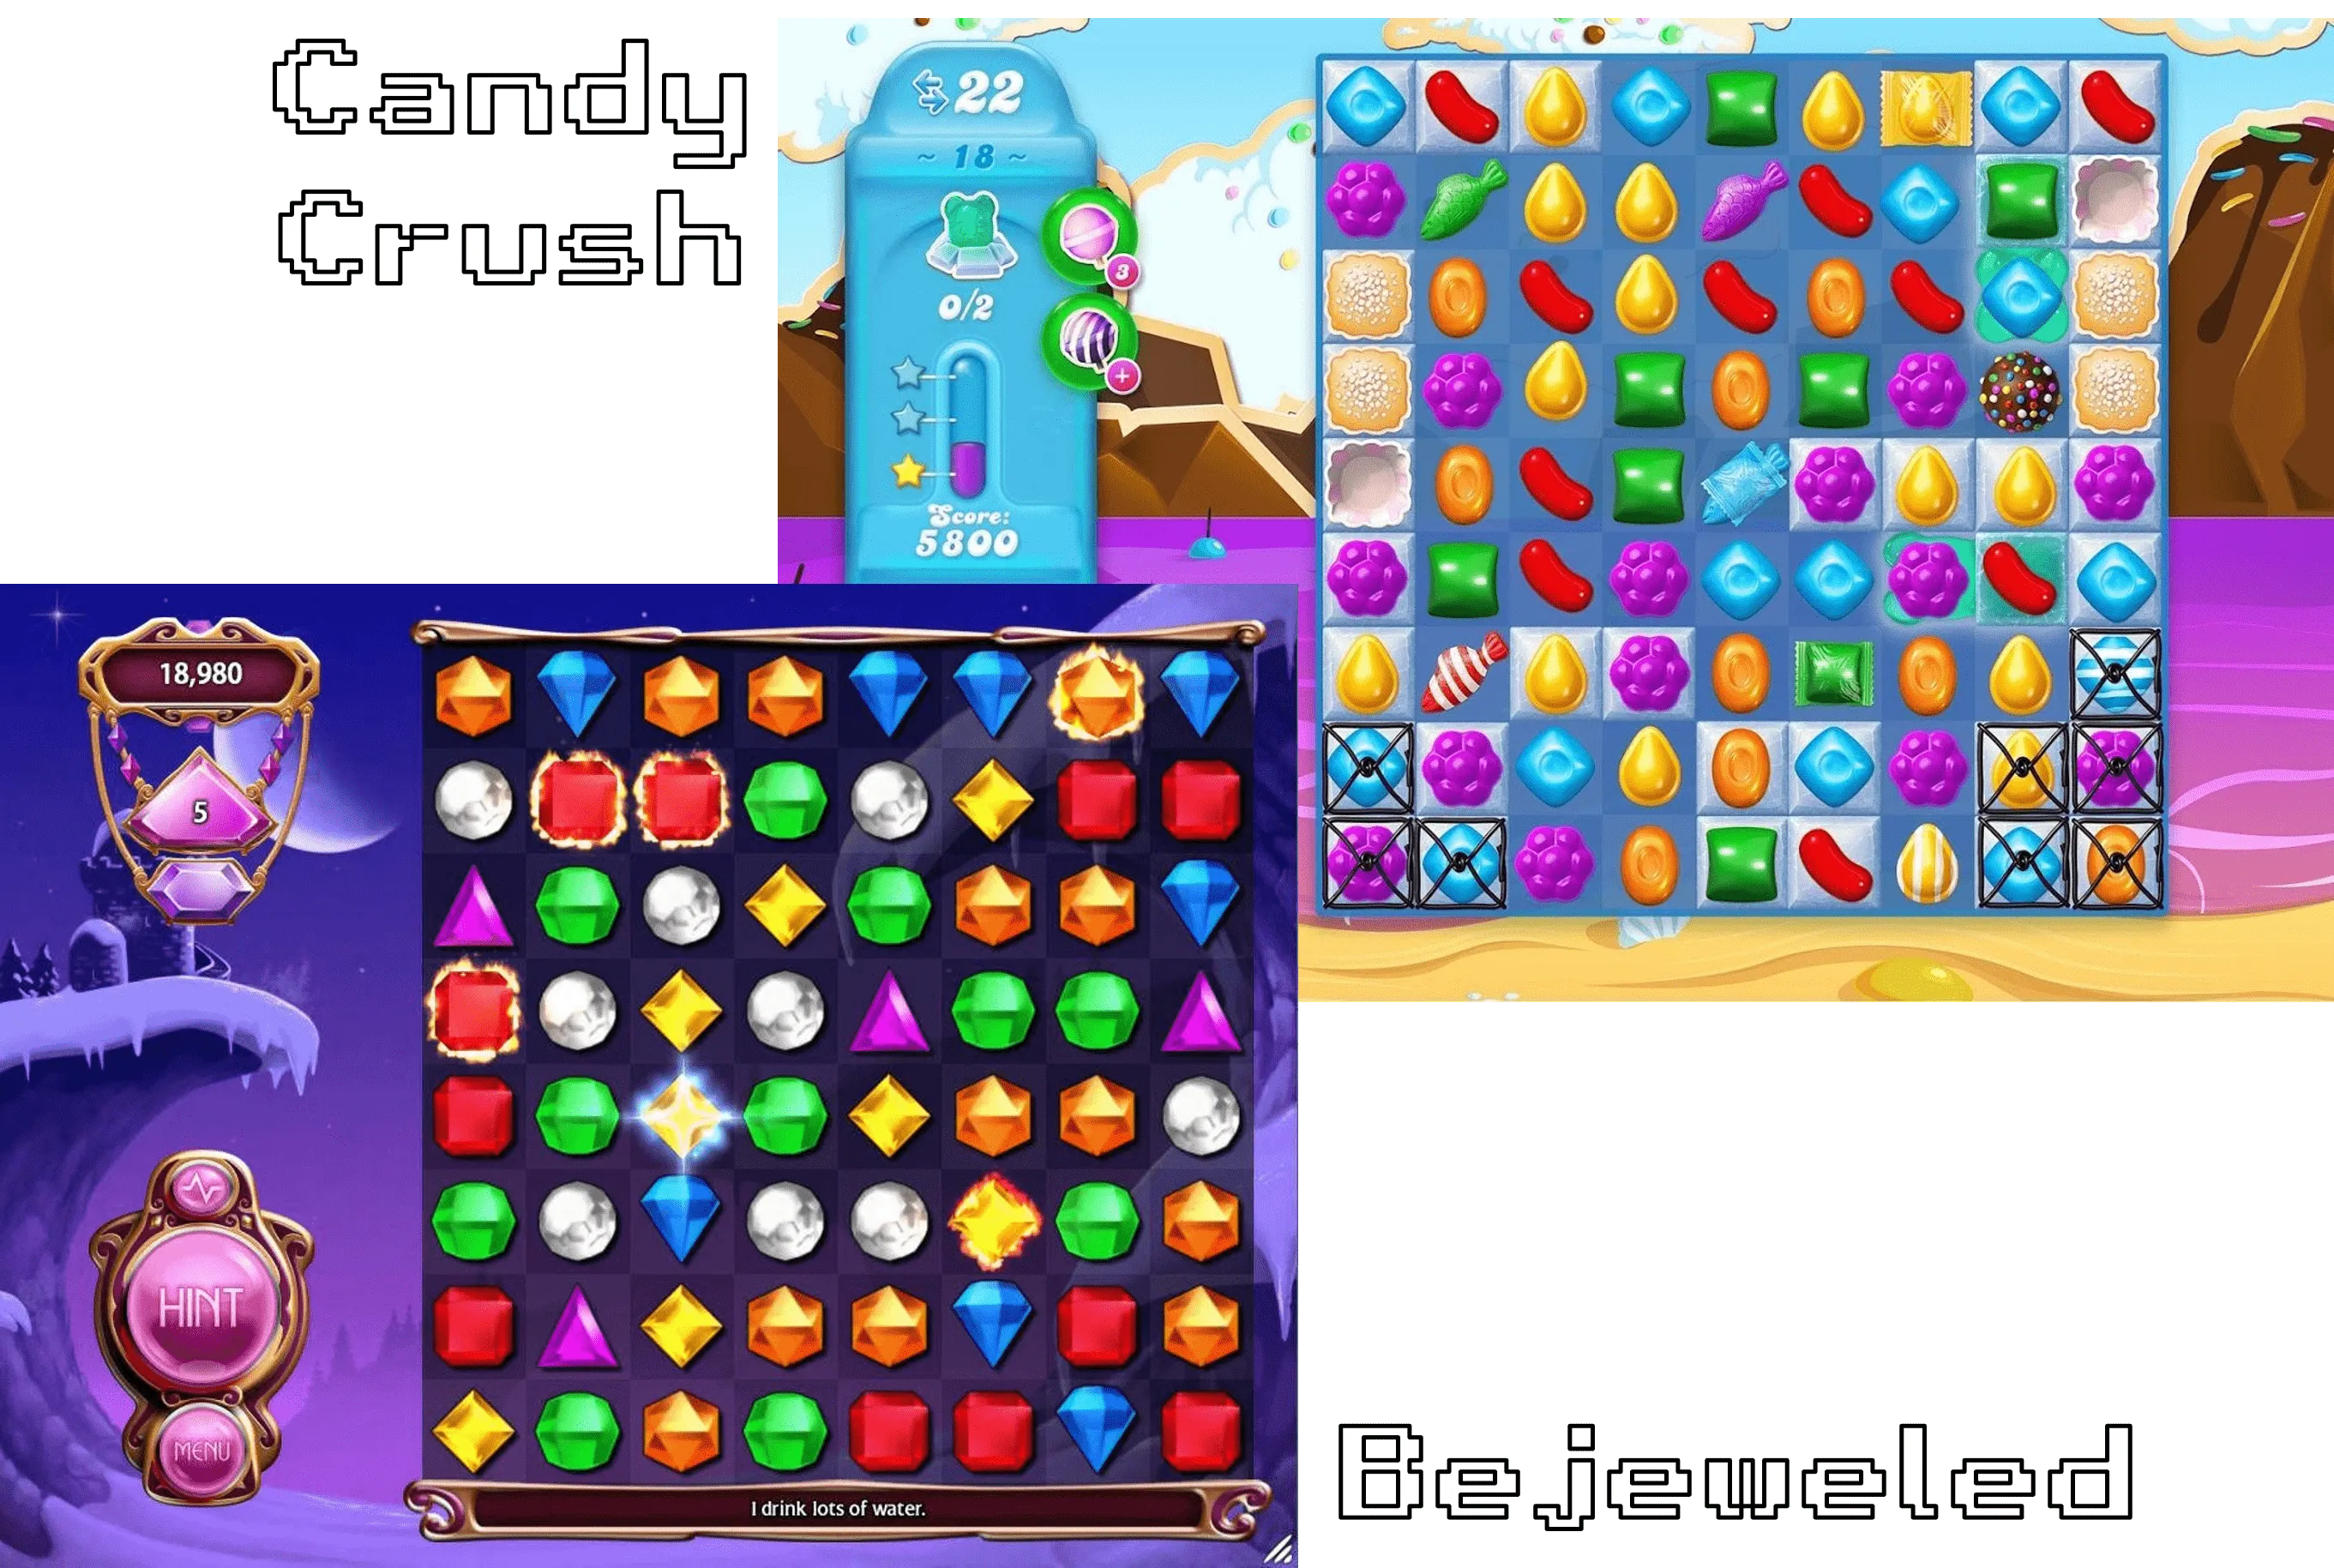
Match-3 has taken several forms over the years, with its roots in games like Tetris in the 80s. Bejeweled, in 2001, is probably the most recognized version of this game, as well as Candy Crush from 2012, though all these games owe Shariki, a DOS game from 1994, for their inspiration. The goal of the game is to match any three tiles of the same pattern by swapping any two adjacent tiles; when three or more tiles match in a line, those tiles add to the player’s score and are removed from play, with new tiles coming from the ceiling to replace them.
🎯 Objectives
Section titled “🎯 Objectives”- Tweening: Tweening will allow us to interpolate a value within a range over time.
- Timers: We will learn how to make things happen within a range of time and/or after a certain amount of time has passed.
- Solving Matches: This is the heart of Match 3; we’ll discuss how we can actually solve matches in order to progress the game.
- Procedural Grids: We’ll discuss how to randomly generate levels using procedural grids for our Match 3 game.
- Sprite Art and Palettes: This is a fundamental part of 2D game development. We’ll discuss how to create sprites and colour palettes for our game.
🔨 Setup
Section titled “🔨 Setup”-
Clone the repo (or download the zip) for today’s lecture, which you can find here.
-
Open the repo in Visual Studio Code.
-
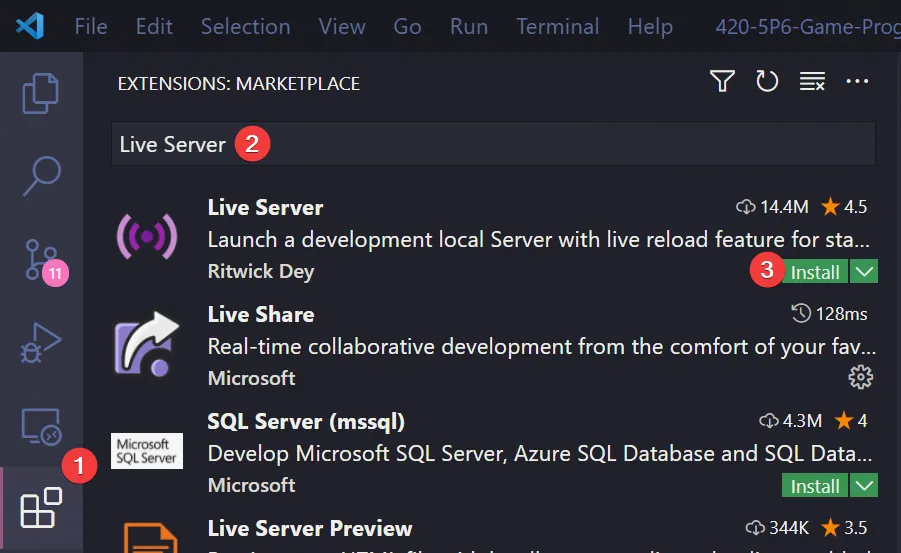
Start Visual Studio Code’s “Live Server” extension. If you don’t have it installed:
-
Click on the extensions icons in the left-hand side navigation.
-
Search for “Live Server”.
-
Click install next to the extension by “Ritwick Dey”. You may have to reload the window.
-
Once it’s installed, click “Go Live” on the bottom right of the window. This should start the server and automatically open a new tab in your browser at
http://127.0.0.1:5500/(or whatever port it says on your machine).- The files the server serves will be relative to the directory you had open in VSC when you hit “Go Live”.
-
🌅 Match-3-0 (The “Day-0” Update)
Section titled “🌅 Match-3-0 (The “Day-0” Update)”Match-3-0 builds the board and populates it with randomly generated tiles. We’ll also discuss the importance of code restructuring as our games become more complex.
Code Restructuring
Section titled “Code Restructuring”If we go back to Breakout-8 for a moment and look at the file structure, we can see that we jammed everything into the src folder. This worked fine for games like Pong and Breakout, but as our games become more complex and the number of files grows, this will get unmanageable. Take a look at Match-3-0 and examine the file structure:
DirectoryMatch-3-0
- index.html
Directoryassets Where we will keep all the fonts/sounds/images for the game.
- images
- sprite_sheet.png
Directorylib All of the files that help us make a game, but are not specifically tied to one game in particular. In other words, the files in here are the framework we’re building with which to create games.
- Drawing.js Contains a helper function to draw a rounded rectangle.
- Game.js
- Graphic.js
- Images.js Maintains an object with all the
Graphicobjects which can be referenced/drawn at any point in the game. - Random.js
- Sprite.js
- State.js
- StateMachine.js
Directorysrc All of the code that is specific to the game.
- config.json Contains configuration data required to load in the game assets. Before, we were doing this inside of
globals.js. We always want to think about “separation of concerns” in software development, and game development is no exception.globals.jswas getting too bloated, so we decided to separate the specific configuration for the game from the actual global variables. - enums.js Too many magic strings and numbers in your program? Enums to the rescue! Here we define enums for things like state names, sound names, and image names. In particular for Match 3, we will also have our tile colours and patterns in here as well.
- globals.js The variables that could potentially be used anywhere in our game.
- main.js The entrypoint and bootstrap for the game. In software development, the term bootstrap generally refers to the place in your code that things are loaded/initialized for the first time before executing the main part of the program. For us, that means loading all the assets and states into the state machine. Then, we create a new
Gameobject, pass in the state machine, and we’re ready to play! Directoryobjects Game objects are the various components of our game. In the case of Match 3, we have a
Boardthat is made up of manyTileobjects.- Board.js
- Tile.js
Directorystates This should be familiar to you by now! This folder will contain all of the different states for our game which will be contained in the global state machine.
- PlayState.js
- config.json Contains configuration data required to load in the game assets. Before, we were doing this inside of
Important Code
Section titled “Important Code”Here’s a step-by-step breakdown of the globals.js file and what each part of the code does. Match-3-0 doesn’t contan all the imports listed below, but you’ll see they get added as we progress through the updates.
import Fonts from '../lib/Fonts.js';import Images from '../lib/Images.js';import Sounds from '../lib/Sounds.js';import StateMachine from '../lib/StateMachine.js';import Timer from '../lib/Timer.js';import Input from '../lib/Input.js';This section imports various utility classes from external modules. These classes manage different aspects of the game:
Fonts: Manages the game’s fonts.Images: Handles the loading and rendering of images.Sounds: Manages sound effects and music.StateMachine: Handles different game states (e.g., title screen, gameplay, game over).Timer: Manages time-based tasks, such as animations or delays.Input: Manages keyboard and mouse input.
Canvas Creation
Section titled “Canvas Creation”export const canvas = document.createElement('canvas');export const context = canvas.getContext('2d') || new CanvasRenderingContext2D();This code creates an HTML <canvas> element, which will be used to draw the game. The context variable refers to the 2D drawing context of the canvas, enabling you to draw shapes, text, images, and more.
Loading Game Configuration
Section titled “Loading Game Configuration”const configFile = './src/config.json';const config = await fetch(configFile).then((response) => response.json());This part loads the game configuration file (config.json) asynchronously using the fetch() API. The configuration file contains important data such as canvas dimensions and asset definitions (e.g., sounds, images, fonts).
Canvas Dimensions
Section titled “Canvas Dimensions”export const CANVAS_WIDTH = config.width;export const CANVAS_HEIGHT = config.height;The canvas dimensions (CANVAS_WIDTH and CANVAS_HEIGHT) are set based on the values defined in the config.json file. This allows for dynamic sizing of the canvas based on the configuration.
Canvas Resizing for Responsiveness
Section titled “Canvas Resizing for Responsiveness”const resizeCanvas = () => { const scaleX = window.innerWidth / CANVAS_WIDTH; const scaleY = window.innerHeight / CANVAS_HEIGHT; const scale = Math.min(scaleX, scaleY); // Maintain aspect ratio
canvas.style.width = `${CANVAS_WIDTH * scale}px`; canvas.style.height = `${CANVAS_HEIGHT * scale}px`;};
window.addEventListener('resize', resizeCanvas);resizeCanvas();This function ensures that the canvas scales responsively based on the browser window size, while maintaining the correct aspect ratio. The resizeCanvas() function is called once initially and again whenever the browser window is resized, ensuring the canvas adapts to different screen sizes.
Set Canvas Properties
Section titled “Set Canvas Properties”canvas.width = CANVAS_WIDTH;canvas.height = CANVAS_HEIGHT;canvas.setAttribute('tabindex', '1');This sets the actual width and height of the canvas based on the values from the configuration. Additionally, setting the tabindex attribute ensures the canvas can receive keyboard input, which is important for handling game controls.
Add Canvas to the DOM
Section titled “Add Canvas to the DOM”document.body.appendChild(canvas);This line adds the canvas element to the HTML document’s body, making it visible on the webpage.
Instantiate Key Game Components
Section titled “Instantiate Key Game Components”export const input = new Input(canvas);export const sounds = new Sounds();export const images = new Images(context);export const fonts = new Fonts();export const timer = new Timer();export const stateMachine = new StateMachine();This section initializes various key game components:
input: Initializes input handling (keyboard and mouse) for the game.sounds: Loads and manages sound effects and music.images: Handles the loading and rendering of game images.fonts: Manages the fonts used in the game.timer: Handles tasks that involve time, such as delays or timed events.stateMachine: Manages different game states (e.g., title screen, gameplay).
Load Assets
Section titled “Load Assets”sounds.load(config.sounds);images.load(config.images);fonts.load(config.fonts);Finally, the game assets (sounds, images, and fonts) are loaded based on the definitions in the configuration file. Each type of asset is loaded into its respective manager class, preparing them for use in the game.
-
In
Board.jswe’re generating our tile sprites by calling our helper method,generateSprites(), fromTile.js:Tile.js generateSprites(images) {const ROWS = 9;const COLUMNS = 6;const SPLIT_POINT = 2;const sprites = [];let x = 0;let y = 0;let counter = 0;for (let row = 0; row < ROWS; row++) {for (let i = 0; i < SPLIT_POINT; i++) {sprites[counter] = [];for (let column = 0; column < COLUMNS; column++) {const sprite = new Sprite(images.get(ImageName.SpriteSheet), x, y, Tile.SIZE, Tile.SIZE);sprites[counter].push(sprite);x += Tile.SIZE;}counter++;}y += Tile.SIZE;x = 0;}return sprites;} -
Unlike the bricks in Breakout, the tiles in Match 3 will always remain in a full grid, which we implement as an 8-by-8 2D array. Within the 2D array, we represent each tile as an array containing
xandycoordinates as well as a reference to the tile sprites. We set up the board by calling a helper function,initializeBoard(), from within the board’s constructor:Board.js initializeBoard() {const colourList = [TileColour.Beige,TileColour.Pink,TileColour.Purple,TileColour.LightGreen,TileColour.Blue,TileColour.Orange,];const patternRange = [TilePattern.Flat, TilePattern.Flat];const tiles = [];for (let row = 0; row < Board.SIZE; row++) {tiles.push([]);for (let column = 0; column < Board.SIZE; column++) {const colour = pickRandomElement(colourList);const pattern = getRandomPositiveInteger(patternRange[0], patternRange[1]);const tile = new Tile(column, row, colour, pattern, this.tileSprites);tiles[row].push(tile);}}return tiles;} -
PlayStatethen calls the board’srender()function to draw the board by looping through the 2D array and drawing each individual tile sprite at itsxandycoordinates.
🔄 Match-3-1 (The “Swap” Update)
Section titled “🔄 Match-3-1 (The “Swap” Update)”Match-3-1 allows the player to swap two tiles on the board. This implementation uses keyboard input to traverse the tiles using w, a, s, and d, select tiles with the enter key, and does not enforce any rules for which tiles can be swapped.
Important Code
Section titled “Important Code”-
In previous games, we handled key presses directly within
main.jsby attaching event listeners to the canvas or window. While this approach worked, as our games became more complex, managing input directly inmain.jscould quickly get messy. Now, we’ve introduced theInputclass, which provides a cleaner, more organized way to handle both keyboard and mouse input.-
The
Inputclass centralizes all input logic into a dedicated structure. It features an enum-like object (Input.KEYS) that maps common keyboard keys to their string values, making it easier to reference keys in a more readable way. This class also adds functionality for capturing mouse movements and button presses, allowing us to easily track and respond to mouse interactions. -
By encapsulating all this input logic in one class, we can simplify our main game loop and make input handling more modular and reusable across different parts of our game.
-
For a detailed look at how the
Inputclass works and how to use it in your game, refer to the detailed reference documentation.
-
-
We’ve added 2 new variables to
PlayStateto keep track of the highlighting and selection behavior:PlayState.js this.cursor = new Cursor(this.board.x, this.board.y);this.selectedTile = null;- The
cursoris what the player will control to be able to move around the board. - The
selectedTilewill turn brighter when the player hitsenteron the tile the cursor is currently pointing at.
- The
-
move()monitors whether the player has pressedw,a,s, ord, and if so, we move them around our 2D tile array accordingly:Cursor.js move() {if (input.isKeyPressed(Input.KEYS.W)) {this.boardY = Math.max(0, this.boardY - 1);} else if (input.isKeyPressed(Input.KEYS.S)) {this.boardY = Math.min(Board.SIZE - 1, this.boardY + 1);} else if (input.isKeyPressed(Input.KEYS.A)) {this.boardX = Math.max(0, this.boardX - 1);} else if (input.isKeyPressed(Input.KEYS.D)) {this.boardX = Math.min(Board.SIZE - 1, this.boardX + 1);} else {return;}} -
Recall that the way to index into a 2D array (i.e., an array of arrays) is by specifying
array[row][column], soarray[0][0]would be the top-left element in the 2D array, andarray[1][2]would be the third element in the second row.PlayState.js const highlightedTile =this.board.tiles[this.cursor.boardY][this.cursor.boardX]; -
In
PlayState::update()we monitor whether the player has pressed “enter” to select a tile. Once two tiles have been selected, we swap them inBoard::swapTiles()by swapping their place in our 2D array as well as swapping their coordinates on the grid:Board.js const temporaryTile = new Tile(selectedTile.boardX, selectedTile.boardY);selectedTile.x = highlightedTile.x;selectedTile.y = highlightedTile.y;highlightedTile.x = temporaryTile.x;highlightedTile.y = temporaryTile.y;selectedTile.boardX = highlightedTile.boardX;selectedTile.boardY = highlightedTile.boardY;highlightedTile.boardX = temporaryTile.boardX;highlightedTile.boardY = temporaryTile.boardY;this.tiles[selectedTile.boardY][selectedTile.boardX] = selectedTile;this.tiles[highlightedTile.boardY][highlightedTile.boardX] =highlightedTile; -
Finally, in addition to handling the rendering of the board as before,
PlayState::render()now contains some additional logic in order to display the highlighting of selected and highlighted tiles.
⏲️ Match-3-2 (The “Tween” Update)
Section titled “⏲️ Match-3-2 (The “Tween” Update)”Match-3-2 adds the functionality to animate the tiles being swapped on the board. To understand how these animations work, we must first understand the concept of tweening.
Important Code
Section titled “Important Code”With our new knowledge of timers and tweening, we can now implement the new Timer in the game so that the swapping of two tiles is animated!
-
First, let’s declare a global
timeringlobals.js:globals.js export const timer = new Timer(); -
Next, in
Board.js, we replace the position swapping code with calls totimer.tween():Board.js this.isSwapping = true;// Swap canvas positions by tweening so the swap is animated.timer.tweenAsync(highlightedTile,{ x: temporaryTile.x, y: temporaryTile.y },0.2);await timer.tweenAsync(selectedTile,{ x: highlightedTile.x, y: highlightedTile.y },0.2);this.isSwapping = false;- We need to
awaitthe tween because we want the animation to finish before proceeding with the rest of the function. - We added a
this.isSwappingflag to prevent the player from swapping tiles while the animation is in progress.
- We need to
-
Finally, we have to make sure we’re updating the
timersomewhere so that it can interpolate the tile coordinates on every frame. One good place to do that isPlayState::update():PlayState.js if (input.isKeyPressed(Input.KEYS.ENTER) && !this.board.isSwapping) {this.selectTile();}timer.update(dt);- Notice that we’re only allowing the player to swap tiles if the board is not currently swapping.
🔍 Match-3-3 (The “Detection” Update)
Section titled “🔍 Match-3-3 (The “Detection” Update)”Match-3-3 implements logic to detect matches of 3 or more tiles in a row or column.
Important Algorithms
Section titled “Important Algorithms”- Starting from the top-left corner of the board (i.e. the first tile), set
colourToMatchto the colour of the current tile. - Then, check the adjacent tile on the right (i.e. the second tile).
- If the second tile is of the same colour as
colourToMatch, incrementmatchCounter. - If not, set
colourToMatchto the colour of the second tile and resetmatchCounterto1.
- If the second tile is of the same colour as
- Repeat this process for the subsequent tiles in that row. As soon as we reach an adjacent tile of a different colour, or the end of the row, if
matchCounter >= 3, we add that group of tiles to amatchesarray. - After all rows have been checked for matches, this process is repeated for each column, going from top to bottom.
- The result of our algorithm is a 2D array containing each array of matches, both horizontal and vertical, with each array containing an array of the tiles in the match.
Important Code
Section titled “Important Code”-
Find the implementation of the algorithm in
Board::calculateMatches(). -
We call
Board::initializeBoard()to make sure we start with a board with no matches:Board.js this.calculateMatches();while (this.matches.length > 0) {this.initializeBoard();} -
We also call this method in
PlayState::selectTile()since we want to check if there are any matches after a tile swap:PlayState.js await this.board.swapTiles(this.selectedTile, highlightedTile);this.selectedTile = null;this.board.calculateMatches();
🏗️ Match-3-4 (The “Removal & Replacement” Update)
Section titled “🏗️ Match-3-4 (The “Removal & Replacement” Update)”Match-3-4 takes care of removing and replacing the tiles that have been detected as a match.
Important Algorithms
Section titled “Important Algorithms”Now the question is how to remove our matching tiles, once we have them all in an array. You might think we’d have to do some tricky coding with their coordinates on the grid or their position on the board, but this problem is solved easier than you may think.
Match Removal Algorithm
Section titled “Match Removal Algorithm”- In
Board::removeMatches(), we loop over each array within our matches array and set the value of each tile tonull, after which we can also set our matches array tonull.- This has the effect of erasing the matched tiles array from existence. The result on the screen would be the board as it was before, but with holes where previously there would’ve been matches.
- The next function in the file,
Board::getFallingTiles(), takes care of shifting down the remaining tiles in each column if needed.- Start from the bottom of each column and check each slot in the column until a
nullslot is found. - Once a
nullslot is found, its position is marked and the next non-nulltile found in the column is tweened down to the marked position. - This process is iterated for each
nullslot in each column.
- Start from the bottom of each column and check each slot in the column until a
Tile Replacement Algorithm
Section titled “Tile Replacement Algorithm”- After we’ve removed matching tiles and shifted down those left over, we need to figure out how to replace the remaining
nullpositions. This is done inBoard::getNewTiles().- For each column, we count the number of
nullspaces and generate that many new tiles. - Then, we can set each tile’s position to be that of one of the
nullspaces, and add it to our board array. - We want the animation to look like the tiles are falling into place, however, so to produce this effect, we tween each new tile from the top of the board to its final position using the
Timerclass.
- For each column, we count the number of
- The possibility exists that the newly-generated tiles will create additional matches when they spawn, so, check for matches again (recursively) after generating the new tiles.
- This is done in
PlayState::calculateMatches()function, which uses the functions inBoard.jsto calculate matches, remove matches, and get falling tiles, and then recurses until it ensures that no new matches have been found.
- This is done in
Important Code
Section titled “Important Code”PlayState::calculateMatches()- Calculates whether any matches were found on the board.
- If so, it removes the matched tiles and tweens the tiles above the matches to their new destinations.
- Generates new tiles to fill in all the new spaces and tween them to their location on the board.
- Calls itself recursively to resolve any new matches that may have resulted from the new tiles.
Board::removeMatches()- Removes the matches from the board by setting the tile slots within them to
null, then settingthis.matchesto empty.
- Removes the matches from the board by setting the tile slots within them to
Board::getFallingTiles()- Shifts down all of the tiles that now have spaces below them, then returns an array that contains tweening information for these new tiles.
Board::getNewTiles()- Scans the board for empty spaces and generates new tiles for each space.
💯 Match-3-5 (The “Progression” Update)
Section titled “💯 Match-3-5 (The “Progression” Update)”Match-3-5 adds scoring, levels, and a timer, such that when the player reaches a certain score on a given level before time runs out, they will go to the next level.
Important Code
Section titled “Important Code”-
PlayStatehas additional member variables to keep track of thescore,level, andtimer.-
The
scoreGoalindicates to the player how many points they need in order to ascend to the next level. This value scales byscoreGoalScalebased on the current level. -
The
scoreis incremented inPlayState::calculateScore():PlayState.js this.board.matches.forEach((match) => {this.score += match.length * this.baseScore;}); -
The
timeris decremented every second and the player must try and reach thescoreGoalbefore time runs out.PlayState.js startTimer() {timer.addTask(() => {this.timer--;if (this.timer <= 5) {sounds.clock.play();}}, 1);} -
If the player reaches
scoreGoalbefore time run out, they ascend to the next level:PlayState.js checkVictory() {if (this.score < this.scoreGoal) {return;}stateMachine.change(StateName.Play, {level: this.level + 1,score: this.scoreGoal,});}
-
-
We’ve added a new state called
GameOverState. This prints “Game Over” on the screen as well as the player’s score when the timer reaches zero. InPlayState, we check if time has run out:PlayState.js checkGameOver() {if (this.timer > 0) {return;}stateMachine.change(StateName.GameOver, {score: this.score,});} -
Lastly, we utilize the state’s
exit()function to clear the timer:PlayState.js exit() {timer.clear();}
✨ Match-3-6 (The “Polish” Update)
Section titled “✨ Match-3-6 (The “Polish” Update)”Match-3-6 adds an animated title screen, animated level transitions, and music. As of right now, we can swap any two tiles on the board. To make this more true to a Match 3 game, we’ll add a limit to only allow the player to swap two adjacent tiles.
Important Code
Section titled “Important Code”-
Let’s start with the new
TitleScreenState. We’ve seen title screens in previous games, and this one is not much different.-
The animated title text is done by keeping the individual letters in an array, and keeping the individual colour values in another array. We then set up a timer to shift the values of the colours array over by 1 so that when the text is rendered, it appears as if the colours are moving from letter to letter:
TitleScreenState.js // TitleScreenState::constructor()this.titleLetters = ['M', 'A', 'T', 'C', 'H', '3'];this.colours = [[217, 87, 99, 255],[95, 205, 228, 255],[251, 242, 54, 255],[118, 66, 138, 255],[153, 229, 80, 255],[223, 113, 38, 255],];// TitleScreenState::startColourTimer()this.colourTimer = timer.addTask(() => {this.colours = this.colours.slice(1).concat(this.colours.slice(0, 1));}, 0.1);// TitleScreenState::drawTitleText()for (let i = 0; i < this.titleLetters.length; i++) {const r = this.colours[i][0];const g = this.colours[i][1];const b = this.colours[i][2];context.fillStyle = `rgb(${r}, ${g}, ${b})`;context.fillText(this.titleLetters[i][0],CANVAS_WIDTH / 2 + 50 * i - 130,CANVAS_HEIGHT / 2 + offSet + 55);} -
The animated background is done by creating a
new Board()and passing in larger dimensions than the board that is used for play. There is a new functionBoard::autoSwap()that uses the timer to randomly swap two tiles. This was created for no other reason than to provide a more interesting background to look at.
-
-
Next, we made a new
LevelTransitionStatethat is in charge of animating a “level label” that comes down from the top of the screen.- There is too much code to paste here, so please take a look at
LevelTransitionStateand make sure you understand how these animations are being done. We’re making heavy use of timers and tweens, and hopefully you can start to imagine all the cool different things you can do with thisTimerclass!
- There is too much code to paste here, so please take a look at
-
Next, we’ve added music. The only difference here from our previous games is that we have multiple music tracks. The currently playing track is different depending on which state you’re in. As I’m sure you’re aware, it is extremely common for games to have many different music tracks based on what state/level you are currently on.
-
For example, we switch tracks like this when changing states:
TitleScreenState.js exit() {sounds.pause(SoundName.Music);}LevelTransitionState.js enter() {sounds.play(SoundName.Music3);}
-
-
Lastly, we’ll limit the player to only be able to swap adjacent tiles. To accomplish this, we take the board distance between the selected tile and the highlighted tile and check if it’s greater than one. If so, that means the player is trying to swap two tiles that are more than one tile’s size apart.
PlayState.js const tileDistance =Math.abs(this.selectedTile?.boardX - highlightedTile.boardX) +Math.abs(this.selectedTile?.boardY - highlightedTile.boardY);if (tileDistance > 1) {sounds.play(SoundName.Error);this.selectedTile = null;}- The
?.syntax is called optional chaining which allows you to check a property on an object even if that object isnullat the time.
- The
And with that, we have a fully functioning game of Match 3!