4.1 - Cookies
🎯 Objectives
- Define what an HTTP cookie is.
- Explain why and how to use cookies.
- Receive cookies from the client and process them on the server.
- Set cookies from the server and send them to the client.
🔨 Setup
- Navigate to the template repository for this exercise and follow these directions to fork it.
- Assuming Docker is started, in VS Code, hit
CMD/CTRL + SHIFT + P, search + rundev container: open folder in container, and select the downloaded folder. - In the terminal of VS Code, hit the
+icon to open a new terminal instance. Runlsto make sure you’re in the root directory of the exercise and that you seepackage.json. - Run
npm installto install the dependencies. - Run
npm run serverinside a JavaScript debug terminal to start the server. - Open the website in the browser.
🔍 Context
For a refresher, please read the cookies chapter. For the short version:
Cookies are arbitrary pieces of data, usually chosen and first sent by the web server, and stored on the client computer by the web browser. The browser then sends them back to the server with every request, introducing states (memory of previous events) into otherwise stateless HTTP transactions. Without cookies, each retrieval of a web page or component of a web page would be an isolated event, largely unrelated to all other page views made by the user on the website. Although cookies are usually set by the web server, they can also be set by the client using a scripting language such as JavaScript (unless the cookie’s HttpOnly flag is set).
🚦 Let’s Go
Part 1: 🍪 Basic Cookies
-
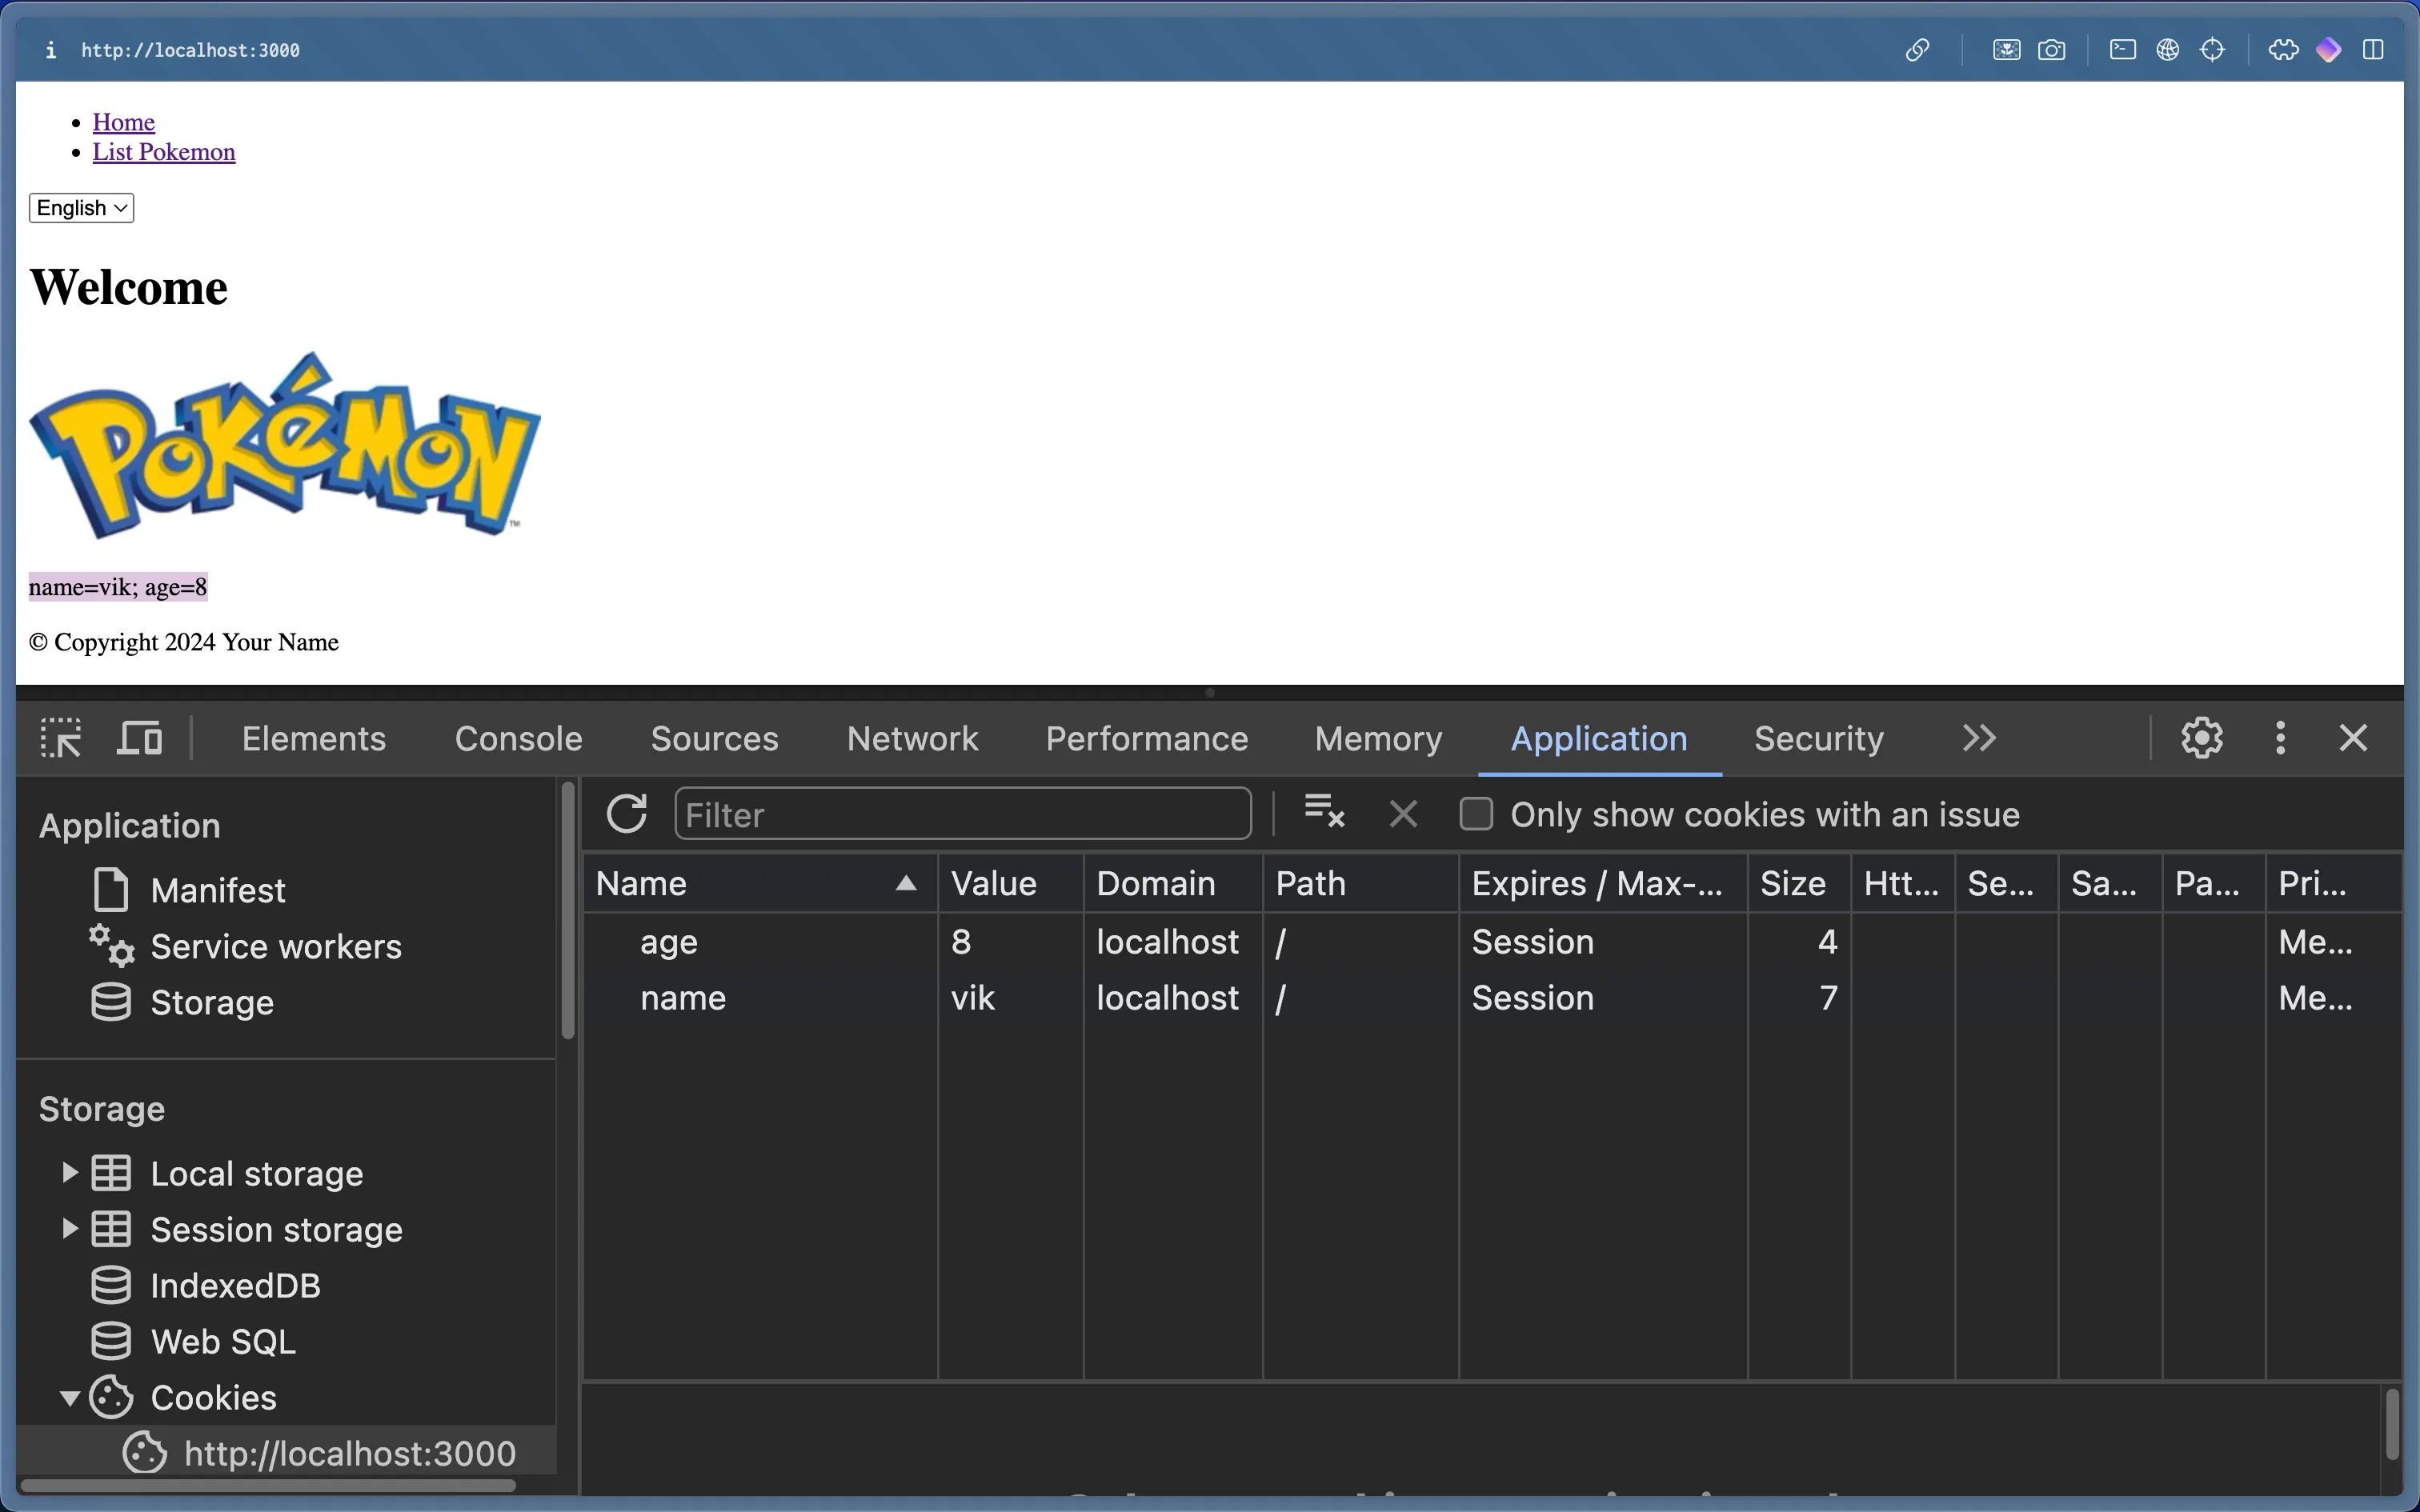
On the homepage, open the dev tools and go to where it displays the cookie information. There should be no cookies listed yet.
- Chrome: Click on
Application>Cookies>http://localhost:3000 - Firefox: Click on
Storage>Cookies>http://localhost:3000
- Chrome: Click on
-
Click the empty spot in the “name” column and type in
nameand pressEnter. Do the same for the “value” column and type inyourNameand pressEnter. Repeat this process for the “name” column and type inage, then type inyourAgefor the value.- Refresh the page and you should see the cookies listed in the body of the page.
- You’ve just manually set a cookie in your browser! This is useful for testing purposes, but we’ll be doing this programmatically in the next steps.
-
Let’s set a cookie programmatically now. Just above where we call
response.end, write:controller.ts res.statusCode = 200;res.setHeader("Content-Type", "text/html");res.setHeader("Set-Cookie", ["likes=somethingYouLike","lovesWebDev=false",]);res.end(...);- We’re setting a response header called
Set-Cookie. The value for this header is an array containing two key/value pair strings, which are the cookies. - Refresh the page once, and you should see all four cookies listed in the dev tools, but only the first two rendered on the page.
- Refresh the page again, and you should see all four cookies listed in the dev tools, and all four rendered on the page.
- We’re setting a response header called
-
The next thing to know about cookies is that the browser automatically sends any cookies that it possesses to the server when making a request.
- To verify this, stick a breakpoint inside
getHome(), and refresh the browser page to send another request. - When the server receives the request, it should pause the execution at the breakpoint. Open the debug tab in VSC and expand the
reqobject, then expand theheadersobject. You might have to click on the little eye 👁️ next toheaderssince it’s a function. After clicking, you should see a property calledcookie, and the cookies listed like this:cookie: 'name=yourName; age=yourAge'; - Hit continue on the debugger, and the response will be sent back to the client. You can refresh the page as many times as you want - we now have a mechanism to remember information between requests/responses!
- To verify this, stick a breakpoint inside
Part 2: 🗣️ Languages
We’ll now build a small web app that uses a cookie to remember the language, English or French, in which the user wants to view the page so that you can experience a real-life use case for cookies. Take a look at the model and notice that we now have language data. This is the data we want to display on the page based on the language the user selects.
-
In the
getCookies()function incontroller.ts, follow the instruction in the comments to parse the cookie string and return an object with the key/value pairs of the cookies.- For example, if we had a cookie string like this:
name=yourName; age=yourAge, the function should return an object like this:{ name: 'yourName', age: 'yourAge' }. - You can test this function by calling it inside
getHome()so that it runs every time you refresh the homepage. You can then log the result to the console to see if it’s working as expected.
- For example, if we had a cookie string like this:
-
Once
getCookies()is working, we can use the language cookie to determine which language to render the page in. We’ll need to modify thegetHome()function to do this.- First, we need to get the language from the cookies object that
getCookies()returns. If the language cookie doesn’t exist, set either French or English as the default language. - Determine which message to render (“Welcome!” or “Bienvenue!”) based on the language cookie. If the language cookie is
fr, we should use the French message. If it’sen, we should use the English message. - Set the
Set-Cookieresponse header to be sent back to the client with the language cookie. This way, the client will remember the language it selected. - Send the message to be rendered in the
HomeView.hbstemplate. - Refresh the page and see the message change based on the language cookie, or the default language if the cookie doesn’t exist.
- Using the dev tools, manually change the language cookie (“en” or “fr”) to test if the message changes accordingly upon refresh.
- First, we need to get the language from the cookies object that
-
Once
getHome()is working, we can do a similar process forgetOnePokemon(). We want to render the Pokemon’s name in the language that the user selected. The language cookie should be used to determine which language to render the Pokemon’s name in.- Get the language from the cookies object that
getCookies()returns. If the language cookie doesn’t exist, set either French or English as the default language. - Determine which language to render the Pokemon’s name in based on the language cookie. If the language cookie is
fr, we should use the French name. If it’sen, we should use the English name. - Set the
Set-Cookieresponse header to be sent back to the client with the language cookie. This way, the client will remember the language it selected. - In
ShowView.hbs, the data is currently using only theenversion. Remove all mentions of.enreplace them with just the property name. For example,{{ pokemon.name.en }}should be{{ name }}. - Send the Pokemon’s name, using either the English or French property on the model/database object, to be rendered in the
ShowView.hbstemplate. - Refresh the page and see the Pokemon’s name change based on the language cookie, or the default language if the cookie doesn’t exist.
- Using the dev tools, manually change the language cookie (“en” or “fr”) to test if the Pokemon’s name changes accordingly upon refresh.
- Do the same for the
typeandinfoproperties. - Remove the cookies from the response payload so that they don’t display on the homepage anymore.
- Get the language from the cookies object that
-
Once
getOnePokemon()is working, we can do a similar process forgetAllPokemon().- See if you can figure out how to do this on your own. If you get stuck, ask for help!
-
We can’t expect the users of our app to know that they can change the language by manually editing their cookies using the dev tools. There should be some sort of interface for this:
Header.hbs <form method="POST" action="/language"><select name="language" onchange="this.form.submit()"><option>Select Language</option><option value="en">English</option><option value="fr">French</option></select></form>-
When the user selects a language from the dropdown menu, it will make a
POST /languagerequest to the server, so we need to create a new route for this. This route should call thechangeLanguage()function in the controller. -
Since it will be a
POSTrequest, that means the data will be in the request’s body. You can call theparseBody()function insidechangeLanguage()to grab the value that the user selected. -
Once you have the request body data, you can use that to determine what to set the
Set-Cookieresponse header to when sending the response back to the client. -
Since this is a
POSTrequest, we should know by now that we should redirect the client to another page after the request is made. In this case, we want to redirect the client back to the page they were on when they made the request. We can use thereferrerrequest header to determine what page the request came from.console.log(req.headers.referer);For example, if the
POST /languagerequest was made from the list page, then the value ofreferrerwill behttp://localhost:3000/pokemon.
-
-
Once you’re able to change the language using the dropdown menu, you can remove the manual cookie setting in the dev tools and test the app by changing the language using the dropdown menu. Test changing languages on each page to verify that the language is being remembered and displayed correctly.
Part 3: 👑 Bonus Challenges
- Have the
<select>already have the correct<option>selected based on the desired language. For example, if the language cookie isfr, theFrenchoption should be selected when the page loads. - Have the language for the
<option>s change when a new language is selected. Notice howEnglishchanges toAnglaiswhenFrenchis selected from the dropdown.
📥 Submission
Take a screenshot of 2 browser windows side-by-side where one window has the English version of a page, and the other has the French version. Make sure to have the dev tools open in both windows to show the cookies.
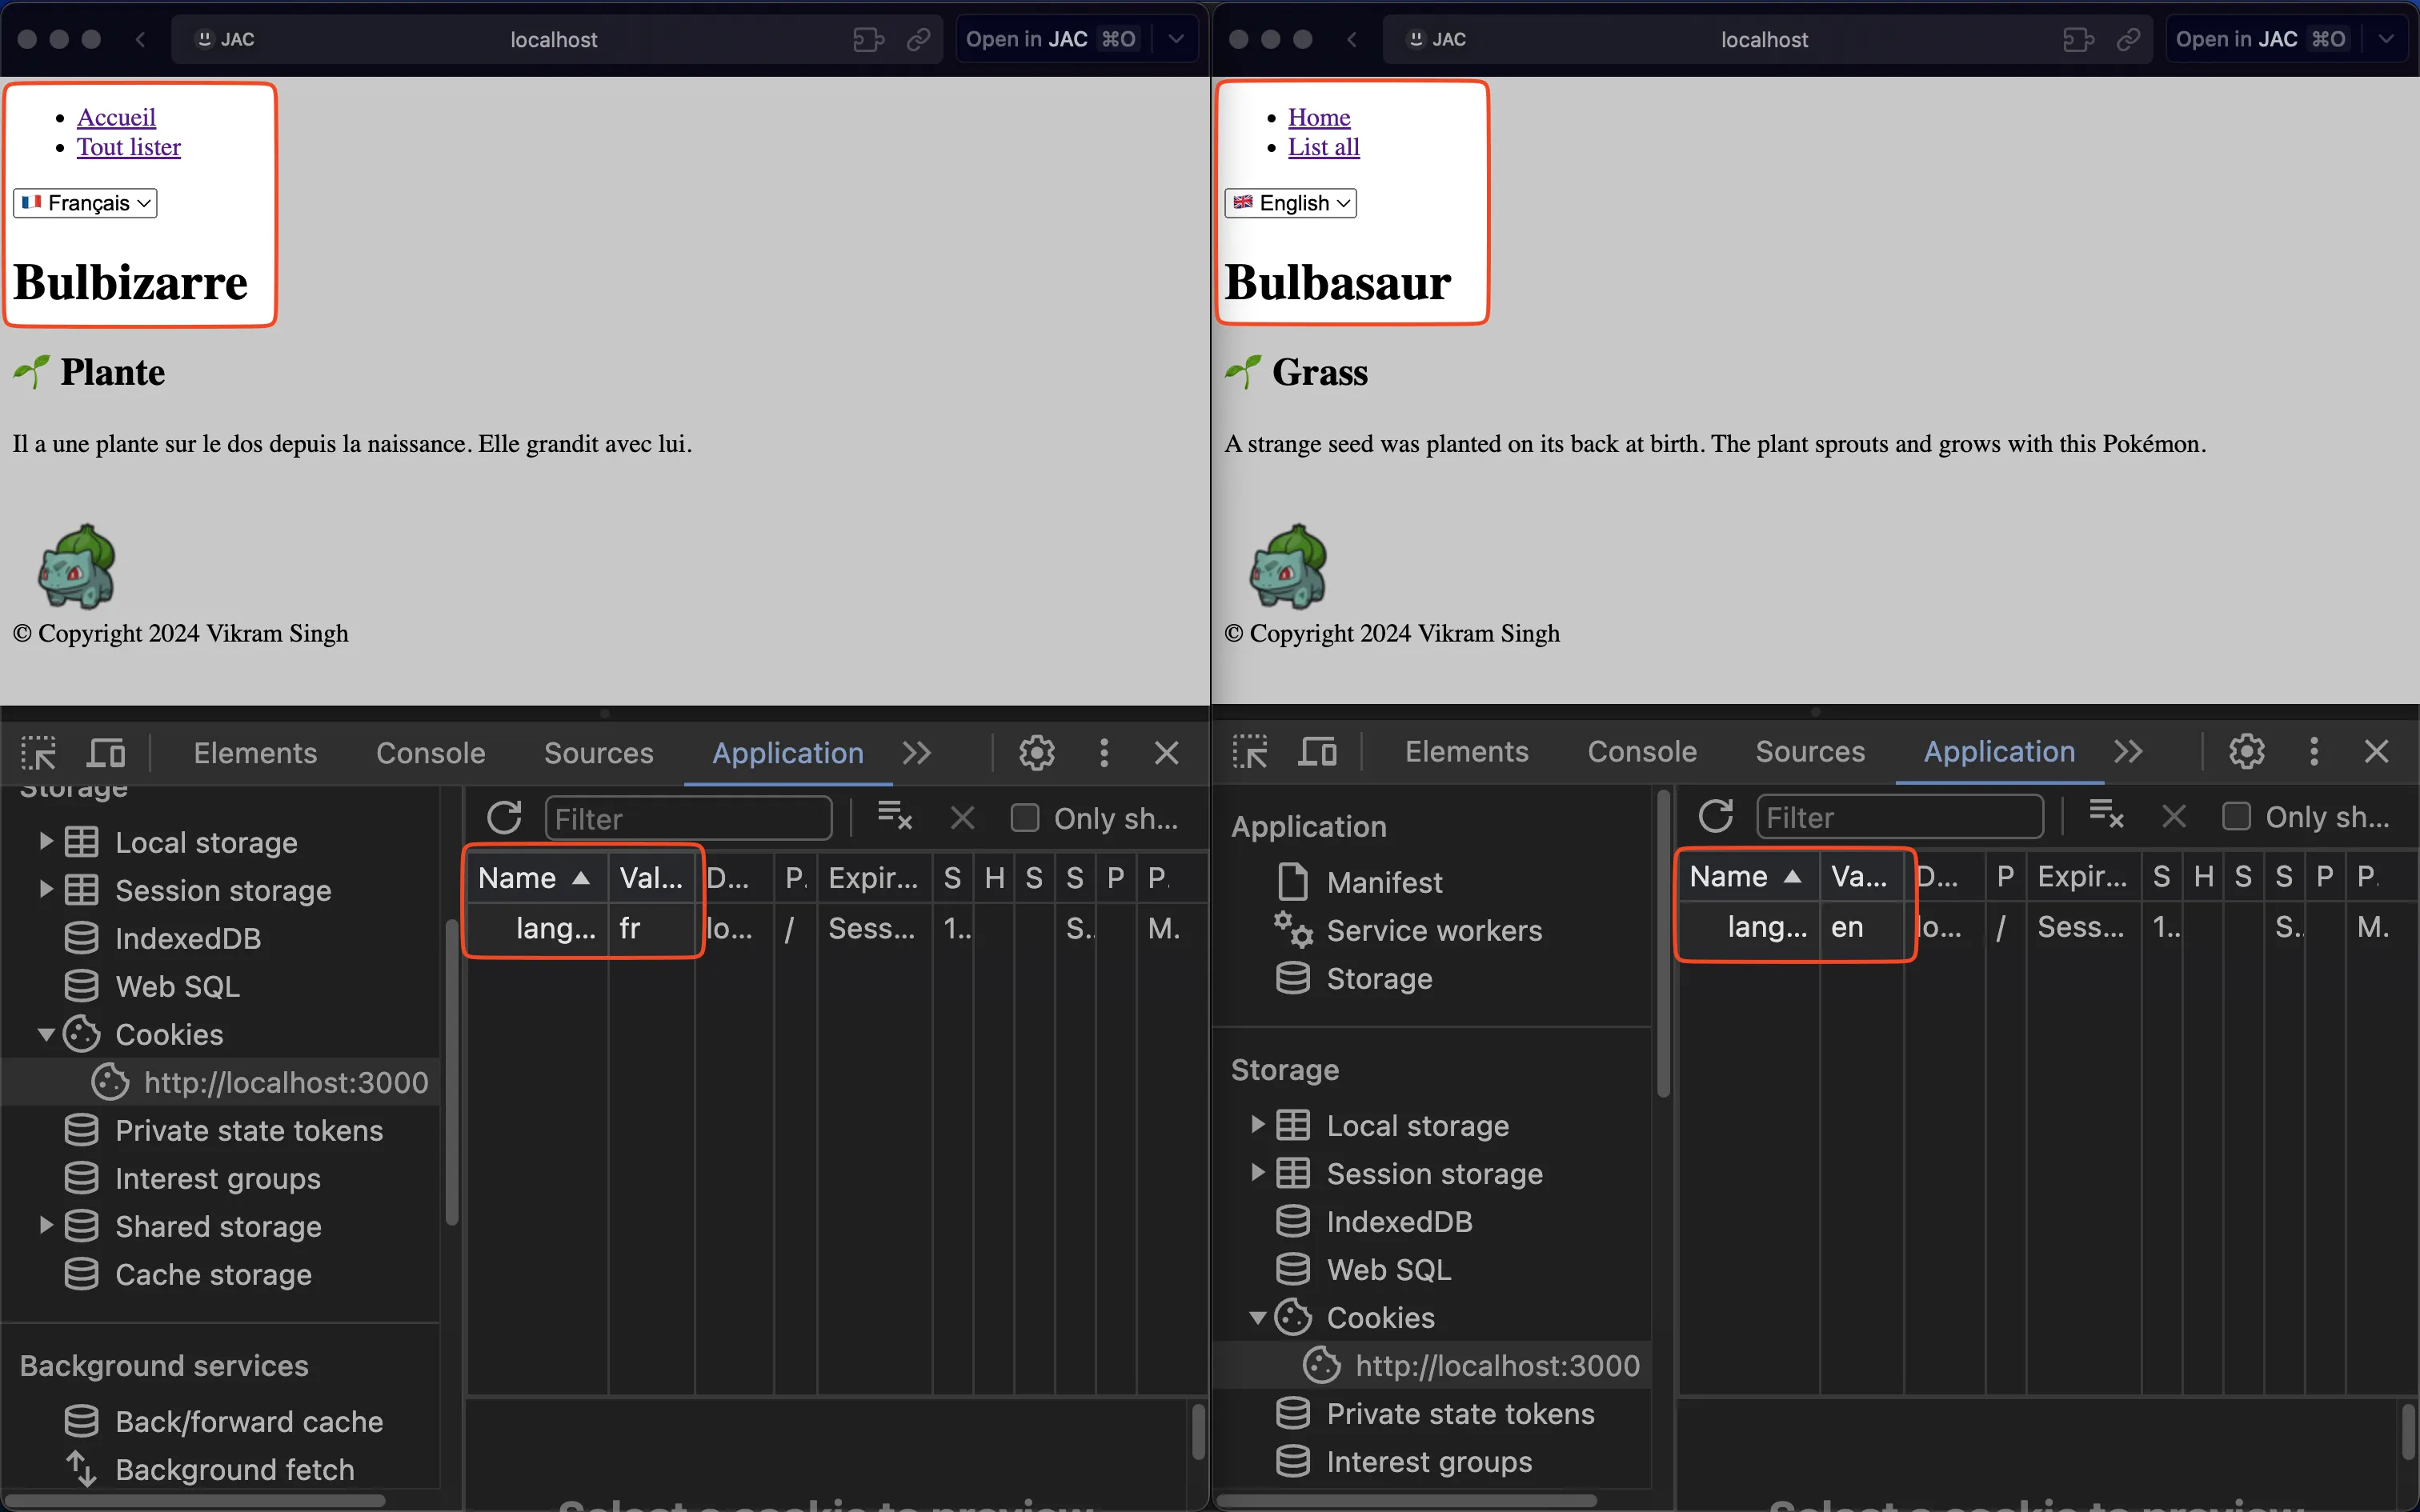
If you want to get fancy and record a tiny video like the one above, you can do so using the screen recorder for Mac or Windows.
Submit the screenshot/video on Moodle.