2.1 - HTTP
🎯 Objectives
- Define the fundamental components and mechanics of the HTTP protocol (requests, responses, status codes, headers).
- Explain the function of a web server and describe how Node.js’s
httpmodule enables its creation. - Implement a basic Node.js web server that handles different HTTP request methods (ex. GET, POST, PUT, DELETE).
- Parse incoming HTTP requests to extract relevant information (URL, method, and data if applicable).
- Construct appropriate HTTP responses, setting status codes, headers, and a JSON payload within the mini-server application.
🔨 Setup
-
Using the terminal, navigate to your
~/web-ii/exercises/folder. -
Go to the repository for this exercise and click
Code -> 📋to copy the URL.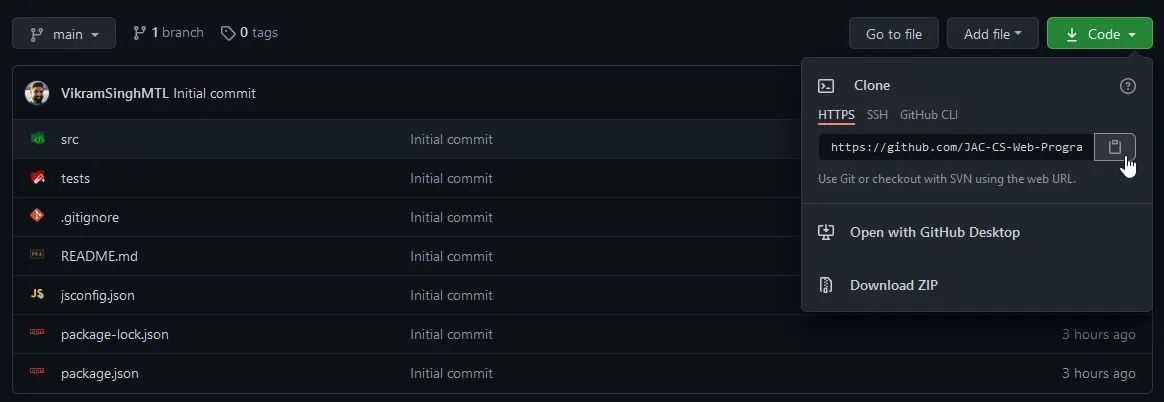
-
Clone the Git repo from the CLI
git clone <paste URL from GitHub>(without the angle brackets) or using a GUI client like GitHub Desktop.- You may have to use the
HTTPSorSSHURL to clone depending on your settings. If one doesn’t work, try the other by clickingUse SSHorUse HTTPSabove the 📋, and copy the new URL.
- You may have to use the
-
Rename the cloned folder to
~/web-ii/exercises/2.1-http/. -
Start Docker Desktop.
-
In VS Code, hit
CMD/CTRL + SHIFT + Pand search + rundev container: open folder in container. -
In the terminal of VS Code, hit the
+icon to open a new terminal instance. Runlsto make sure you’re in the root directory of the exercise and that you seepackage.json. -
Run
npm installto install all our dependencies.
🔍 Context
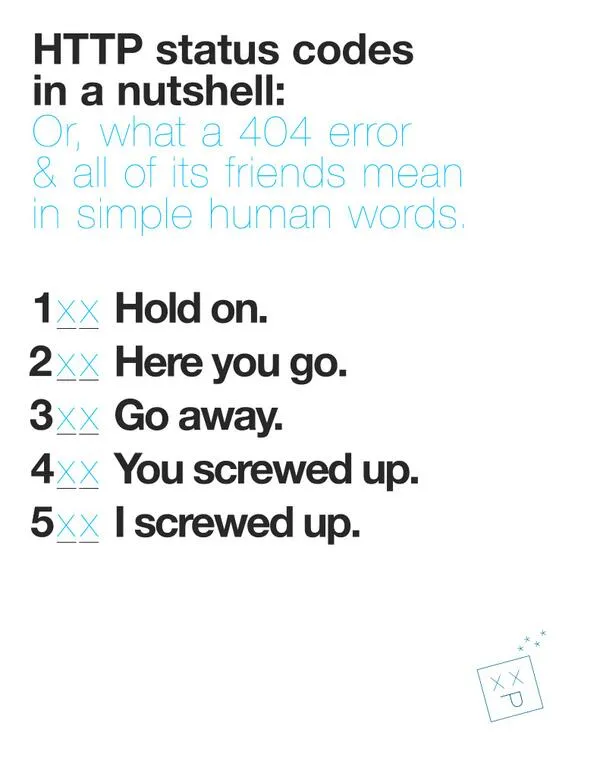
Earlier this week we played the HTTP Card Game to learn the basic aspects of HTTP. To review, please read this chapter in the notes before continuing as it will teach you the terminology and concepts you need to know for this exercise.
🚦 Let’s Go
Part 1: Building the Foundation
-
Start Your Server Engine
- Open your
server.tsfile and paste the following code to set up a basic Node.js web server with TypeScript types:
server.ts import http, { IncomingMessage, ServerResponse } from "http"; // The core Node module we're using to build our server.const hostname = "127.0.0.1"; // or 'localhost'const port = 3000;const server = http.createServer((req: IncomingMessage, res: ServerResponse) => {// Request handling will come later!});server.listen(port, hostname, () => {console.log(`Server running at http://${hostname}:${port}/`);});- Start the server by running
npm run server.
- Open your
Part 2: Processing Requests
-
Open a separate terminal window. We’ll use this one to make cURL requests and see the server responses.
-
The GET Test
- In your cURL terminal, type:
curl -v http://localhost:3000/ - Examine the output; you’ll see HTTP headers and other details of the request/response exchange. We haven’t set up response content yet, so don’t be surprised if the process hangs!
- Hit CTRL + C to exit the process.
- In your cURL terminal, type:
-
Let’s Build an Actual Response
- Back in
server.ts, inside thecreateServercallback, let’s handle GET requests to the root path (’/’):
server.ts // Inside createServer(...)if (req.method === "GET" && req.url === "/") {res.statusCode = 200;res.setHeader("Content-Type", "application/json");res.end(JSON.stringify({ message: "Hello from the Pokemon Server!" },null,2));}- Save the file to apply the changes. The server should automatically restart in the terminal.
- Run the GET cURL command again (
curl -v http://localhost:3000/); you should see our JSON response!
- Back in
Part 3: Expanding our Pokemon API
-
Data Setup
- Add the Pokemon interface and sample data at the top of
server.ts:
interface Pokemon {id: number;name: string;type: string;}const database: Pokemon[] = [// Add one Pokemon object here with ID 1.]; - Add the Pokemon interface and sample data at the top of
-
GET All Pokemon
- Enhance the
GET /route:
if (req.method === "GET" && req.url === "/") {// ... (Existing code remains the same)} else if (req.method === "GET" && req.url === "/pokemon") {res.statusCode = 200;res.setHeader("Content-Type", "application/json");res.end(JSON.stringify({ message: "All Pokemon", payload: database },null,2));}- Try it!
curl -v http://localhost:3000/pokemon - You should see an array of one Pokemon.
- Enhance the
-
GET One Pokemon
server.ts // ... Inside createServer (...)else if (req.method === 'GET' && req.url?.startsWith('/pokemon/')) {// Find Pokemon by IDconst urlParts = req.url.split('/');const pokemonId = parseInt(urlParts[2]);const foundPokemon = database.find(pokemon => pokemon.id === pokemonId);if (foundPokemon) {res.statusCode = 200;res.setHeader('Content-Type', 'application/json');res.end(JSON.stringify({ message: 'Pokemon found', payload: foundPokemon }, null, 2));} else {res.statusCode = 404;res.end(JSON.stringify({ message: 'Pokemon not found' }, null, 2));}} else if (req.method === 'GET' && req.url === '/pokemon') {// Existing: Get all Pokemon ...}- Try it!
Terminal window curl -v http://localhost:3000/pokemon/1 // Replace '1' with the Pokemon's ID- URL Matching: We now check if the URL starts with
/pokemon/. If so, we assume the user is requesting a specific Pokemon. - ID Extraction: We split the URL and get the ID.
- Finding the Pokemon: The
findmethod on thepokemonarray locates the Pokemon with the matching ID. - Success/Error Response: We send either the Pokemon details or a ‘404 Not Found’ error.
-
POST a New Pokemon
- Let’s enable creating new Pokemon entries using a POST request to
/pokemon. We’ll assume the client is sending JSON data representing a Pokemon.
server.ts // ... Inside createServer(...)else if (req.method === 'POST' && req.url === '/pokemon') {let body = ''; // To store incoming datareq.on('data', (chunk) => {body += chunk.toString();});req.on('end', () => {const newPokemon = JSON.parse(body);// Add basic data logic (you'd likely use a database in a real application)newPokemon.id = database.length + 1; // Simple ID assignmentdatabase.push(newPokemon);res.statusCode = 201; // 'Created'res.setHeader('Content-Type', 'application/json');res.end(JSON.stringify({ message: 'Pokemon created!', payload: newPokemon }, null, 2));});}- In your cURL terminal, send a POST request:
Terminal window curl -v -X POST -H "Content-Type: application/json" \-d '{"name": "Pikachu", "type": "Electric"}' \http://localhost:3000/pokemon- You should see your success response! Check your
GET /pokemonto see if the new addition is there.
- Let’s enable creating new Pokemon entries using a POST request to
Part 4: Updating Pokemon (PUT)
Now, it’s time to let trainers modify their Pokemon! Your task is to implement a PUT endpoint at /pokemon/:id.
- Method: This will be a ‘PUT’ request.
- URL with ID: The endpoint needs to include a way to capture the ‘id’ of the Pokemon to update (think about URL patterns).
- Parsing Data: PUT requests likely bring JSON data, similar to POST.
- Finding and Modifying: You’ll need logic to locate the correct Pokemon (by id) and replace its data.
- Error Handling: Don’t forget the “Pokemon not found” case!
Part 5: Removing Pokemon (DELETE)
Let’s allow trainers to say goodbye to their Pokemon. Create a DELETE endpoint at /pokemon/:id.
- Method: Use the ‘DELETE’ HTTP method.
- ID Matters: You’ll again need to extract the Pokemon’s ‘id’ from the URL.
- Splicing: Review array modification methods in JavaScript to figure out how to remove a Pokemon.
- Success/Error: Send appropriate responses like in GET and PUT.
Testing:
Don’t forget to use cURL to test your new endpoints. Check the GET /pokemon afterwards to verify your changes worked.
📥 Submission
Perform the following cURL operations without the -v flag:
POSTa new/pokemon.GETthe/pokemon/2that was inserted.UPDATEthe/pokemon/2to have a different name.GETall the/pokemonto verify the name was changed.DELETEthe/pokemon/2.
Take a screenshot of the output so that I can see all 5 statements were run successfully. Submit the screenshot you took to the Moodle dropbox for this exercise.